
If you've ever wanted to make a DVD with your own menus, then we walk through the simple steps to authoring your first DVD. Using free software and tools, anyone can now make their own DVDs with just a DVD writer (obviously), some blank DVDs and the video clips you want to use.
Getting Started
The software we are going to use to create the DVD menus and structure is DVDStyler which provides a nice unified frontend to an assortment of tools (dvdauthor, mkisofs etc), so you can simply create your DVD without needing to understand each step of the process (creating menus, iso images etc). So grab a copy of the latest version of the software, and install it.
We are going to walk through building a simple menu for a DVD consisting of just two video clips, so you can see how to add as many clips as you need. Building more complicated menus, dealing with subtitles, aspect ratios etc is beyond the scope of this article (though we may cover it in a later article).
Building the Menu
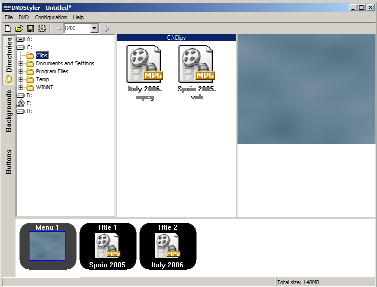
Start up the DVDStyler application, and choose your language from the first popup. The main screen should look something like this (with the backgrounds tab on the left hand edge selected)
Now we are ready to start adding text to the menu. Right click on the background in the right hand pane, and select add then text.

Drag the text around the screen to position it where you want, then right click on the text and select properties to change the text show

Next, click on the buttons tab on the left hand edge of the window, and drag the button from the left pane to the right pane. Drag the button once for each menu item you want.

Right click and select properties of each of the buttons you have added to the right pane, and change the text of each button to something more meaningful. Also set the action of each button to point to the correct video click, as labeled in the bottom timeline pane.

Now the menus are setup how you want, you can create the disk.
Writing to disc
To create the DVD, simply select file then Burn DVD... from the main menu. If your DVD drive isn't recognised by DVDStyler then don't worry, just create an ISO image instead, and use your normal DVD software (such as Nero Express) to burn the image to the DVD.

It usually takes a while for DVDStyler to process and check all of your video clips first before it starts creating the DVD image to burn.
If your DVD is going to be less than 1024MB in size, then it's probably best to create a VideoCD instead, and there appear to be some compatibility issues with small Video DVDs, as not all players seem to want to play them, and Nero Express may want to write them to a CD instead of a DVD.
Once the DVD is burned, you should be able to put it in your normal DVD player and enjoy your hardwork on your TV. The DVDStyler website has a more detailed manual for creating more complex DVD menus once you get the hang of creating your own video DVDs.


0 comments:
Post a Comment